官方:https://developer.android.com/reference/android/widget/ImageView
在 Android 中,ImageView类用于在应用程序中显示图像文件。由于 Android 设备的屏幕尺寸不同,图像文件在 Android 中易于使用但难以掌握。一个 android 丰富了一些最好的 UI 设计小部件,使我们能够构建美观和有吸引力的基于 UI 的应用程序。
重要提示: ImageView带有不同的配置选项以支持不同的比例类型。Scale 类型选项用于将图像的边界缩放到imageview的边界。其中一些 scaleTypes 配置属性是 center、center_crop、fit_xy、fitStart 等。您可以阅读我们的ScaleType 教程以了解有关它的所有详细信息。
下面是 XML 中的 ImageView 代码:
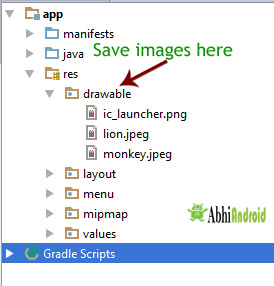
确保将狮子图像保存在可绘制文件夹中
<ImageView
android:id="@+id/simpleImageView"
android:layout_width="fill_parent"
android:layout_height="wrap_content"
android:src="@drawable/lion" />
ImageView 的属性:
现在让我们讨论一些有助于我们在xml文件中配置 ImageView 的重要属性。
1、id: id是android中用来唯一标识一个image view的属性。下面是我们设置图像视图id 的示例代码。
<ImageView
android:id="@+id/simpleImageView"
android:layout_width="fill_parent"
android:layout_height="wrap_content"
/>
2. src: src 是一个用来设置源文件的属性,或者你可以在你的imageview中说image来让你的布局更有吸引力。
下面是示例代码,其中我们设置了保存在可绘制文件夹中的 imageview lion 的源。
<ImageView
android:id="@+id/simpleImageView"
android:layout_width="fill_parent"
android:layout_height="wrap_content"
android:src="@drawable/lion" /><!--set the source of an image view-->
在 Java 中:
我们还可以在运行时在java类中以编程方式设置源图像。为此,我们使用 setImageResource() 方法,如下面的示例代码所示。
/*Add in Oncreate() funtion after setContentView()*/
ImageView simpleImageView=(ImageView) findViewById(R.id.simpleImageView);
simpleImageView.setImageResource(R.drawable.lion);//set the source in java class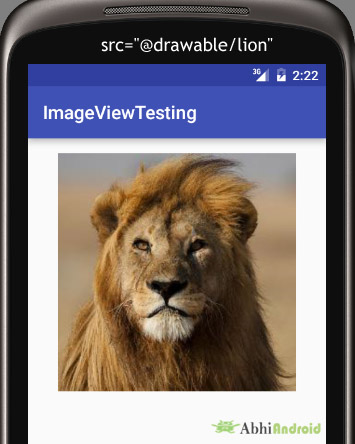
3. background: 背景属性用于设置ImageView的背景。我们可以在 ImageView 的背景中设置颜色或可绘制对象。
下面是示例代码,其中我们在背景中设置黑色,并在image view的 src 属性中设置图像。
<ImageView
    android:id="@+id/simpleImageView"
    android:layout_width="fill_parent"
    android:layout_height="wrap_content"
    android:src="@drawable/lion"
    android:background="#000"/><!--black color in background of a image view-->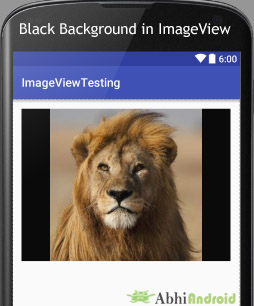
在 Java 中:
我们还可以在java类中以编程方式在运行时设置背景。在下面的示例代码中,我们在图像视图的背景中设置了黑色。
/*Add in Oncreate() funtion after setContentView()*/
ImageView simpleImageView=(ImageView) findViewById(R.id.simpleImageView);
simpleImageView.setBackgroundColor(Color.BLACK);//set black color in background of a image view in java class
4. padding: padding属性用于设置Imageview的左、右、上或下的内边距。
- paddingRight:设置图像视图右侧的填充。
- paddingLeft:设置图像视图左侧的填充。
- paddingTop:设置图像视图顶部的填充。
- paddingBottom:设置图像视图底部的填充。
- padding:从图像视图的所有边设置填充。
下面是 padding 属性的示例代码,其中我们从图像视图的所有侧面设置了 30dp 的填充。
<ImageView
    android:id="@+id/simpleImageView"
    android:layout_width="fill_parent"
    android:layout_height="wrap_content"
    android:background="#000"
    android:src="@drawable/lion"
    android:padding="30dp"/><!--set 30dp padding from all the sides-->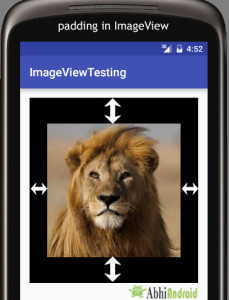
5. scaleType: scaleType 是一个属性,用于控制如何调整图像大小或移动图像以匹配此图像视图的大小。比例类型属性的值可以是 fit_xy、center_crop、fitStart 等。
下面是缩放类型的示例代码,其中我们将图像视图的缩放类型设置为 fit_xy。
<ImageView
android:id="@+id/simpleImageView"
android:layout_width="fill_parent"
android:layout_height="wrap_content"
android:src="@drawable/lion"
android:scaleType="fitXY"/><!--set scale type fit xy-->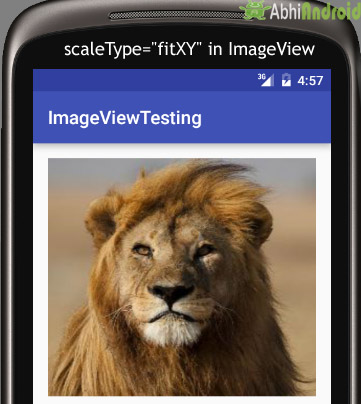
让我们再举一个比例类型的例子来了解比例类型在图像视图中的实际工作。
在下面的示例代码中,我们设置了比例类型“fitStart”的值,该值用于在图像视图的开始处调整图像,如下所示:
<ImageView
    android:id="@+id/simpleImageView"
    android:layout_width="fill_parent"
    android:layout_height="wrap_content"
    android:src="@drawable/lion"
    android:scaleType="fitStart"/><!--set scale type fit start of image view-->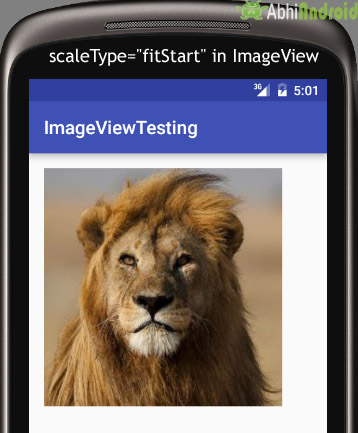
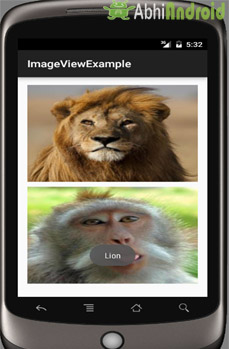
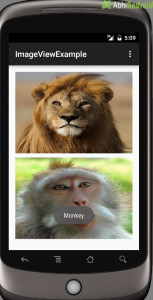
图像视图示例:
下面是 imageview 的示例,其中我们显示了狮子和猴子的两个动物图像。每当用户单击图像时,动物名称就会在屏幕上显示为吐司。下面是最终输出和代码
第 1 步:创建一个新项目并将其命名为 ImageViewExample。
在这一步中,我们通过填写应用程序的所有必要详细信息,如应用程序名称、包名称、api 版本等,在android studio中创建一个新项目。
选择文件->新建->新建项目并填写表格,然后单击“完成”按钮。
第 2 步:从网上下载狮子和猴子的两张图片。现在将这些图像保存在项目的可绘制文件夹中。
第 3 步: 现在打开 res -> layout -> activity_main。xml(或)主要。xml 并添加以下代码:
在这一步中,我们添加了用于在屏幕上以相对布局显示图像视图的代码 。在这里确保您已经在您的可绘制文件夹中保存了两个名为狮子和猴子的图像。
<RelativeLayout xmlns:android="http://schemas.android.com/apk/res/android"
    xmlns:tools="http://schemas.android.com/tools"
    android:layout_width="match_parent"
    android:layout_height="match_parent"
    android:paddingBottom="@dimen/activity_vertical_margin"
    android:paddingLeft="@dimen/activity_horizontal_margin"
    android:paddingRight="@dimen/activity_horizontal_margin"
    android:paddingTop="@dimen/activity_vertical_margin"
    tools:context=".MainActivity">


    <ImageView
        android:id="@+id/simpleImageViewLion"
        android:layout_width="fill_parent"
        android:layout_height="200dp"
        android:scaleType="fitXY"
        android:src="@drawable/lion" />

    <ImageView
    android:id="@+id/simpleImageViewMonkey"
    android:layout_width="fill_parent"
    android:layout_height="200dp"
    android:layout_below="@+id/simpleImageViewLion"
    android:layout_marginTop="10dp"
    android:scaleType="fitXY"
    android:src="@drawable/monkey" />

</RelativeLayout>
第 4 步: 现在打开 app -> java -> package -> MainActivity.java 并添加以下代码:
在这一步中,我们添加代码来启动图像视图,然后对它们执行点击事件。
package example.abhiandriod.imageviewexample;

import android.graphics.Color;
import android.support.v7.app.AppCompatActivity;
import android.os.Bundle;
import android.view.Menu;
import android.view.MenuItem;
import android.view.View;
import android.widget.ImageView;
import android.widget.Toast;

public class MainActivity extends AppCompatActivity {

    @Override
    protected void onCreate(Bundle savedInstanceState) {
        super.onCreate(savedInstanceState);
        setContentView(R.layout.activity_main);
        ImageView simpleImageViewLion = (ImageView) findViewById(R.id.simpleImageViewLion);//get the id of first image view
        ImageView simpleImageViewMonkey = (ImageView) findViewById(R.id.simpleImageViewMonkey);//get the id of second image view
        simpleImageViewLion.setOnClickListener(new View.OnClickListener() {
            @Override
            public void onClick(View view) {
                Toast.makeText(getApplicationContext(), "Lion", Toast.LENGTH_LONG).show();//display the text on image click event
            }
        });
        simpleImageViewMonkey.setOnClickListener(new View.OnClickListener() {
            @Override
            public void onClick(View view) {
                Toast.makeText(getApplicationContext(), "Monkey", Toast.LENGTH_LONG).show();//display the text on image click event
            }
        });
    }


}
输出:
现在在模拟器中启动 AVD 并运行应用程序。您将在屏幕上看到狮子和猴子的图像。单击任何动物图像,他的名字将出现在屏幕上。我们点击了狮子。