抖动图标和长按已经成为我们对手机屏幕非常熟悉的东西。特别是在 iPhone 上,摇动图标通常意味着它们是可拖动和可编辑的——而长按已成为获得额外选项的正常方式。
在本教程中,我们将着眼于使用 Javascript 和 CSS 重新创建这些效果。在本教程中,我们将介绍:
- 新的 CSS 功能– 例如背景模糊和动画弹性框。
- 长按– 如何使用 Javascript 创建长按效果。
- 拖动– 如何在 Javascript 中创建简单的拖放系统。
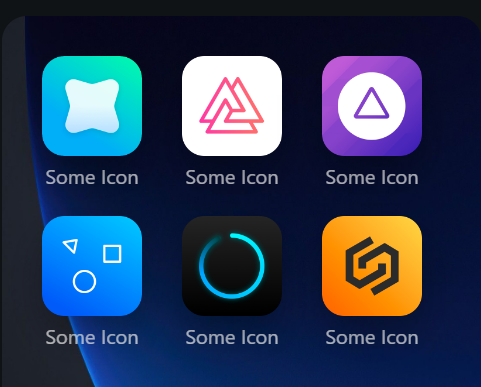
演示#
一如既往,让我们从演示开始。这就是我们今天计划创建的。
- 如果您单击并按住图标一秒钟,将弹出一个弹出窗口。
- 如果您总共点击并按下 2 秒钟,图标将开始晃动 – 就像在 iPhone 上一样。这也适用于移动设备。
第 1 步:HTML#
在本教程中,我不会过多地关注 HTML,因为它非常初级 – 足以说明此演示的 HTML 由以下部分组成:
- 图标容器– 一个容器 div,其中包含有关各个图标的所有信息。
- 封面– 位于整个演示顶部的封面 div,如果用户长按以显示子菜单,它将模糊。
- 一些通知– 底部的一些通知提供一些操作说明。
- 一个子菜单– 一个子菜单,当用户点击各种图标时,它会四处移动。
第 2 步:CSS#
大多数 CSS 都是非常基础的,但是我会指出一些我使用过的重要且有趣的东西,它们是 HTML UI 设计中非常典型的东西。所以我们的目标是让图标可以拖动,但是有很多方法可以影响它。首先,我们有一个弹出的封面来模糊背景。然后我们有那些讨厌的图像,大多数浏览器都允许用户拖动。
为了解决大部分这些问题,我们可以在 CSS 中使用一个名为pointer-events: none;. 这意味着用户无法与我们的 HTML 元素进行交互。所以在模糊的封面上,我们在它不模糊时删除指针事件,并在背景模糊时添加它们。这意味着用户通常会点击这个 HTML 元素,直到我们想要模糊背景,此时它才变为活动状态:
#iphone .cover {
    position: absolute;
    top: -1rem;
    backdrop-filter: blur(4px);
    left: -1rem;
    width: calc(100% + 2rem);
    opacity: 0;
    z-index: 99999;
    height: calc(100% + 2rem);
    transition: all 0.2s ease-out;
    background: rgba(0,0,0,0);
    pointer-events: none; /* No pointer events! */
}
[data-dropdown="true"] #iphone .cover {
    pointer-events: all; /* All pointer events */
    opacity: 1;
}
#iphone .icon-container img {
    width: calc(100% + 2px);
    pointer-events: none; /* No pointer events */
}
背景滤镜
这将我们带到另一个非常有用的 CSS 属性 – backdrop-filter。除了 Firefox 之外的所有主要浏览器都支持背景过滤器,如果标签稍微透明,我们可以为 HTML 标签后面的元素添加效果。在我们的.coverCSS 中,我们将其定义为:
backdrop-filter: blur(4px);
动画图标删除
对于整个演示,我希望能够顺利移除图标。图标根据弹性框排列- 为此,我创建了一个自定义动画,使图标有效缩放为零(这样看起来它们会缩小) – 然后同时减小它们的宽度。效果是,当一个图标被移除时,图标似乎彼此靠近,从而创建流畅的动画。
当用户单击删除按钮时,此动画将应用在一小段 Javascript 中。
@keyframes scaleBack {
    0% {
        transform: scale(1);
        width: 5rem;
    }
    40% {
        opacity: 1;
    }
    50% {
        width: 5rem;
        opacity: 0;
        transform: scale(0.0001);
    }
    100% {
        width: 0rem;
        transform: scale(0.0001);
    }
}
使用转换的积极因素
- 让我们对其他事物使用顶部、底部、左侧和右侧定位。
- 使用 3d 加速,所以动画超级快!
第 2 步:Javascript#
这里的 Javascript 并不是非常复杂——事实上,很多复杂性来自于试图使图标可拖动。基本上我们要跟踪几个事件:
- 当用户点击一个图标时——我们想要测量多长时间,这样我们就可以显示下拉菜单或摇动效果。
- 当用户点击按钮时– 我们想要删除长按计时器,并重置任何其他运动跟踪器。
- 当用户单击删除按钮时——我们要删除该图标。
- 当用户点击按钮以外的任何东西时——我们想要移除效果。
因此,您可能已经猜到了,我们使用指针事件。我总是建议您尽可能尝试使用指针事件,因为它们既兼容移动端,也兼容桌面端。这样一来,您通常只需要为所有设备编写一个脚本。Pointer Events 将mousedown等事件处理程序替换为pointerdown。
跟踪状态
为了跟踪用户,我们有两种状态 – shaking和dropdown。我们使用 HTML 标签中的数据属性来跟踪这一点——如果图标在晃动,则data-shaking="true"在 body 标签上显示,如果下拉菜单可见,则data-dropdown="true"在 body 标签上显示。我们这样做是为了可以根据状态更改元素的 CSS。
然后我们有长按。要管理长按,我们要做的就是:
- 创建一个 pointerdown 变量——这个变量在用户点击时立即设置为 true,在他们释放时立即设置为 false。
- 创建超时– 我们在 1 秒和 2 秒后检查 pointerdown 是否为真。如果是,那么我们要么使图标显示下拉菜单,要么摇动。
- 设置重置功能– 如果用户放弃长按,我们会重置所有变量,因此如果他们再次尝试,我们可以再次使用它们。
在代码中,这看起来像这样:
// For selection of the icons and removal icons
let icons = document.querySelectorAll('.icon-container');
let removals = document.querySelectorAll('.remove-icon');

// These all store data on the mouse position at different times in the code
let pointerdown = false;
let offset = 0;
let mouseXInit = 0;
let mouseYInit = 0;
let mouseX = 0;
let mouseY = 0;
let positionX = 0;
let positionY = 0;
let currentTop = 0;
let currentLeft = 0;

// This is for holding our timers
let timers = { first: undefined, second: undefined, third: undefined }


let helpers = {
    reset: function(extended) {
        // This is our reset - it sets everything back to zero, whenever we need to
        // All variables and settings are reset
        mouseX = 0;
        mouseY = 0;
        mouseXInit = 0;
        mouseYInit = 0;
        currentTop = 0;
        currentLeft = 0;
        offset = 0;
        if(typeof timers.first !== "undefined") {
            clearTimeout(timers.first);
        }
        if(typeof timers.second !== "undefined") {
            clearTimeout(timers.second);
        }
        if(typeof timers.third !== "undefined") {
            clearTimeout(timers.third);
        }
        if(typeof extended == "undefined") {
            document.querySelector('.sub-menu').classList.remove('show-sub-menu');
            document.body.setAttribute('data-shaking', false);
            document.body.setAttribute('data-dropdown', false);
            pointerdown = false;
            icons.forEach(function(item) {
                item.setAttribute('data-selected', false);
                item.style.top = 0;
                item.style.left = 0;
            })
        }
    },
    checkPoint: function(x, y, limit) {
        // This checks if the users mouse has moved more than a certain limit. If it has, then they may be dragging..
        // So we don't cause the long press animation
        if(x < limit && x > limit * -1 && y < limit && y > limit * -1) {
            return true;
        } else {
            return false;
        }
    }
}

// For every icon
icons.forEach(function(item) {
    // Add a pointerdown event
    item.addEventListener('pointerdown', function(e) {
        // Get the click location and set pointerdown to true
        pointerdown = true;
        mouseXInit = e.pageX;
        mouseYInit = e.pageY;

        // Get the left and top position of the item, if any
        currentTop = parseFloat(item.style.top) || 0;
        currentLeft = parseFloat(item.style.left) || 0;
        // Set a timer to wait for a hold click
        timers.first = setTimeout(function() {
            // Only do this if pointerdown is true, and if the user hasn't moved more than 10px while clicking down
            if(pointerdown === true && document.body.getAttribute('data-shaking') !== "true" && helpers.checkPoint(mouseX, mouseY, 10)) {

                // Icon is now selected, and the dropdown should appear
                item.setAttribute('data-selected', true);
                document.body.setAttribute('data-dropdown', true);

                // Find out where exactly the icon is (x, y) coordinates
                let left = item.getBoundingClientRect().left - document.querySelector('#iphone').getBoundingClientRect().left;
                let bottom = item.getBoundingClientRect().bottom - document.querySelector('#iphone').getBoundingClientRect().top;
                // Show the sub menu and move it to where the icon is
                document.querySelector('.sub-menu').classList.add('show-sub-menu');
                document.querySelector('.sub-menu').style.left = `${left}px`;
                document.querySelector('.sub-menu').style.top = `${bottom - 16}px`;

            }
        }, 1000);
        // If the user is still clicking after 2 seconds
        timers.second = setTimeout(function() {
            // Check they are clicking
            if(pointerdown === true && helpers.checkPoint(mouseX, mouseY, 10)) {
                // Now all icons should shake
                document.body.setAttribute('data-shaking', true);
                item.setAttribute('data-dragging', true);
                // Hide the sub menu
                document.querySelector('.sub-menu').classList.remove('show-sub-menu');
                document.body.setAttribute('data-dropdown', false);
                // Give each animation for shaking a delay, to give the appearance of randomness
                timers.third = setTimeout(function() {
                    icons.forEach(function(i) {
                        i.style.animationDelay = `${offset}s`;
                        offset += 0.1;
                    })
                }, 300);
            }
        }, 2000);
        // If the icons are shaking, then the user may be trying to drag this particular icon. Set that icon
        // to have a data-dragging of true. We can use this later
        if(document.body.getAttribute('data-shaking') === "true") {
            item.setAttribute('data-dragging', true);
        }
    });
    // if the user lifts their mouse, then reset everything
    item.addEventListener('pointerup', function() {
        helpers.reset(false);
    });
})
移动
当用户单击一个图标时,我们必须为该图标的移除设置动画。为此,我们首先添加一个动画,使图标缩小并缩小到0. 我们在之前的 CSS 部分谈到了这一点。然后在动画结束后,我们设置另一个超时以从 HTML 中完全删除图标。
removals.forEach(function(item) {
    item.addEventListener('click', function(e) {
        // If the removal icon is clicked, then get the parent HTML element - i.e. the icon itself
        let icon = item.parentNode;
        // Animate the icon to disappear
        icon.style.animation = 'scaleBack 0.4s linear 1 forwards';
        // Remove the dropdown, if it is around
        document.body.setAttribute('data-dropdown', false);
        // And finally, delete the icon completely using the remove() function.
        setTimeout(() => {
            icon.remove();
        }, 400);
    })
});
可拖动性#
接下来,让我们实现一个基本的拖动形式。拖拽在概念上可以分解成几块:
- 首先,当用户点击页面时,我们使用
e.clientX, e.clientY. 这为我们提供了他们点击的坐标。 - 当他们移动并按下指针时,我们会发现他们的新位置与原始点击位置之间的差异。这个差值就是移动的总量。
- 然后我们将该数量添加到该图标的
top和leftCSS 值。这给了我们阻力效果。最终,如果用户停止拖动,我们将重置所有值,以便图标快速回到原来的位置。
由于我们需要跟踪很多事情,因此我们有很多变量。我们可以使用 跟踪初始鼠标位置mouseXInit, mouseYInit。positionX, positionY然后,在激活摇动后,将差异存储在 中。mouseX, mouseY我们还在摇晃开始前单独存放。如果用户在点击时移动太多,我们不会激活长按效果,所以我们可以用 来检查mouseX, mouseY。
在代码中,我们最终得到这样的结果:
document.body.addEventListener('mousemove', function(e) {
    // If the user is clicking down
    if(pointerdown === true) {
        // Track how much they're moving. If it's too much, we'll cancel the long press timeout
        mouseY = mouseXInit - e.pageY;
        mouseX = mouseXInit - e.pageX;
        if(document.body.getAttribute('data-shaking') == "true") {
            // If they are moving around after shaking starts, then they are dragging
            positionX = mouseXInit - e.pageX;
            positionY = mouseYInit - e.pageY;
            // Set the element to have a data-dragging attribute of true
            let el = document.querySelector('[data-dragging="true"]');
            if(el !== null) {
                // Move the element around
                el.style.top = `${positionY * -1 + currentTop}px`;
                el.style.left = `${positionX * -1 + currentLeft}px`;
            }
        }
    }
})

// When the user lifts their pointer up, then reset all the variables
document.body.addEventListener('pointerup', function(e) {
    if(!e.target.matches('.remove-icon')) {
        helpers.reset(false);
    }
    // And end all icon dragging by setting data-dragging to false on all icons.
    icons.forEach(function(item) {
        item.setAttribute('data-dragging', false);
    });
});
结论#
本教程到此结束。我希望你喜欢这篇文章,并且可能学到了一些新的 CSS 技能。一如既往,这里有一些有用的链接:


