介绍
由于图形绘制的必要性正在侵入Web开发空间。在软件开发中,大多数时间都要求使用水印图像。现在,PHP使人们只需编写PHP代码即可轻松使用堆栈创建水印图像。
因此,在不浪费太多时间的情况下,让我们直接进入本教程。
如何使用 PHP GD 在 PHP 中创建水印映像
PHP GD库有几个惊人的功能,可以实现图像处理。可以裁剪图像、调整大小、旋转图像、添加水印等。使用通用语言处理器。在大多数 Web 应用程序中,您需要添加动态图像或向图像添加水印。在之前的教程中,我们探讨了如何生成图像:使用 PHP GD 库。本指南将教您如何使用PHP为照片添加水印。
我们可以使用PHP中的GD扩展,通过以下步骤为图像添加水印:
- 打开原始图像:
$img = imagecreatefromjpeg("IMAGE.JPG"); - 设置文本颜色:
$red = imagecolorallocatealpha($img, 255, 0, 0); - 将文本添加到图像中:
imagettftext($img, 18, 0, 0, 24, $red, "PATH\FONT.TTF", "COPYRIGHT"); - 保存带水印的图像:
imagejpeg($img, "WATERMARKED.JPG", 60);
GD库的水印示例
您可以使用GD库构建几种东西,在本教程中,我们将构建带有水印的图像!以下是 GD 库水印的示例。
构建可与 GD 库一起输出为文件的水印图像
使用PHP GD,可以使用库实现很多事情,这就是为什么GD是PHP的杰出一面。
GD 库的一些用例示例
- 用于生成图像
- 用于生成水印图像
- 用于生成验证码
现在,我们将构建一个水印,该水印将作为文件输出到我们的文件夹和浏览器中。
首先,启动会话和重定向,将我们带到另一个页面,我们将在其中查看图像。我们可以通过标头位置来实现这一点,然后我们可以直观地查看代码。
<?php
session_start();
// //here we are sending this our raw code to a new page
 header("Location: other_file.php");
?>
接下来,创建一个将为图像分配的变量。
请参阅下面的代码。
<?php
 //hard code the image you want to watermark from the directory
 $image1 = 'image/camera.jpg';

  //hard code the watermark image from the directory
  $image2 = 'image/potato.png';
?>
然后,您将在一个操作中为变量列表赋值。
<?php
 //assign values to a list of variables in one operation
 list($width, $height) = getimagesize($image2);
?>
将方法赋值给 .您将使用另一个函数来获取图像的内容。在我们的例子中,我们将使用 来检索图像名称,在我们的例子中,我们将其分配给一个变量 ,文件将获取将包含变量的内容。**imagecreatefromstring()**imagecreatefromstring()file_get_content()$image
该函数提供与使用提供的数据创建的图片相对应的图像标识。Imagecreatefromstring()
下面的代码是上面解释的典型示例。
<?php
 $image1 = imagecreatefromstring(file_get_contents($image1));
 $image2 = imagecreatefromstring(file_get_contents($image2));
?>
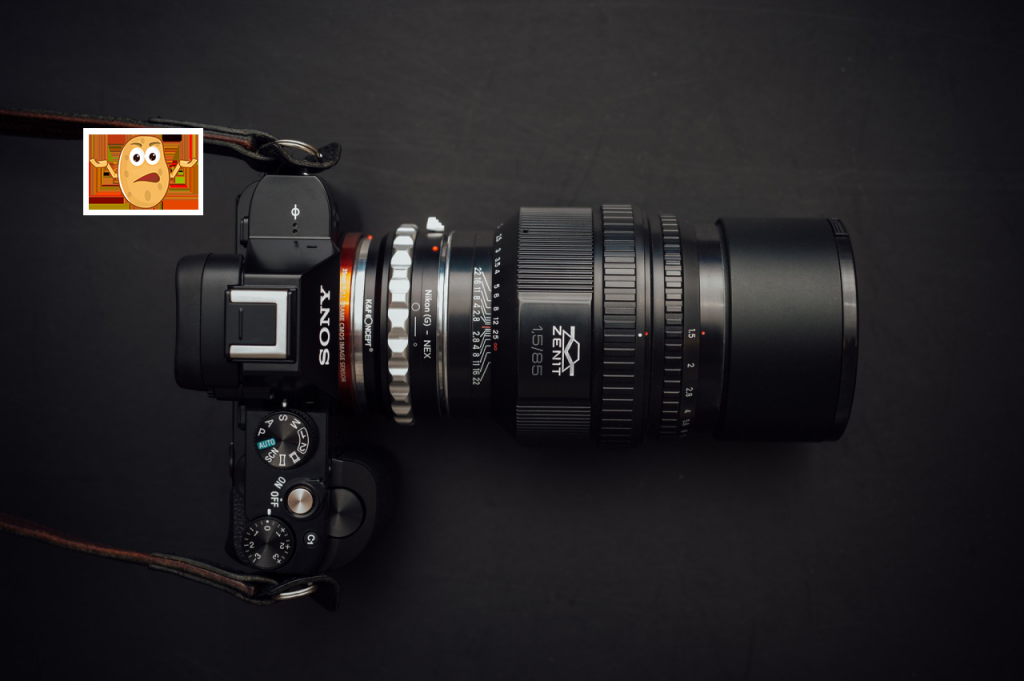
现在,让我们复制并合并图像的各个部分。下面的函数所做的是,它获取图像变量和水印图像变量,然后将它们与上述代码中所述的其他变量和值合并。
在收集了所有这些值之后,函数将把它们组合起来,使其成为一个,这样我们就可以在一天结束时调用一个变量。
请参阅下面的代码。
<?php
  //here we took a portion of a picture and combine it.
 imagecopymerge($image1, $image2, 104, 160, 0, 0, $width, $height, 100);
?>
在完成函数的过程之后,我们可以处理或处理一个变量。imagecopymerge(``)
现在我们希望图像显示为 png 文件。因此,它将入到名为 的函数中。该方法将图像转换为png文件。imagepng()imagepng()
注意:函数内部将包含一个经过复制合并过程的图像变量。
<?php
  //Create a PNG file and output it to a file or the browser.
 imagepng($image1);
?>
因此,让我们将图像保存在我们的文件夹(进行编码的文件夹)中。
这次您将使用 ,它将接受两个参数,第一个是包含图像的变量,第二个是您希望图像在文件夹中承载的名称。imagepng()
然后我们将其赋给一个变量,并调用 a,然后将其赋给包含该函数的变量。$image1$_SESSION[``'``img``'``]imagepng()
<?php
 //if you want to save the merged image
 $image1 =  imagepng($image1, 'merged.png');
 $_SESSION['img'] = $image1;
?>
这是上述代码的结构。
<?php
session_start();
// //here we are sending this our raw code to a new page
 header("Location: other_file.php");

//hard code the image you want to watermark from the directory
 $image1 = 'image/camera.jpg';

 //hard code the watermark image from the directory
 $image2 = 'image/potato.png';

 //assign values to a list of variables in one operation
 list($width, $height) = getimagesize($image2);

 //returns an image identifier representing the image obtained from a given data
 $image1 = imagecreatefromstring(file_get_contents($image1));
 $image2 = imagecreatefromstring(file_get_contents($image2));

 //here we took a portion of a picture and combine it.
 imagecopymerge($image1, $image2, 104, 160, 0, 0, $width, $height, 100);

 //Create a PNG file and output it to a file or the browser.
 imagepng($image1);

 //if you want to save the merged image
 $image1 =  imagepng($image1, 'merged.png');
 $_SESSION['img'] = $image1;
?>
然后,调用我们要重定向的页面,在该页面上,它将包含一个图像标记,该标记将从我们的文件目录中调用图像。other_file.php
只需在页面上方写下生成的图像的名称,即可在标记中创建会话。tag.src=``""<?php ?>
请参阅下面的代码
<?php
  session_start();
?>
<!DOCTYPE html>
<html>
<head>
        <meta charset="utf-8">
        <meta name="viewport" content="width=device-width, initial-scale=1">
        <title>Final</title>
</head>
<body>
        <img src="merged.png">

</body>
</html>
现在,看看您保存的图像文件在哪里。
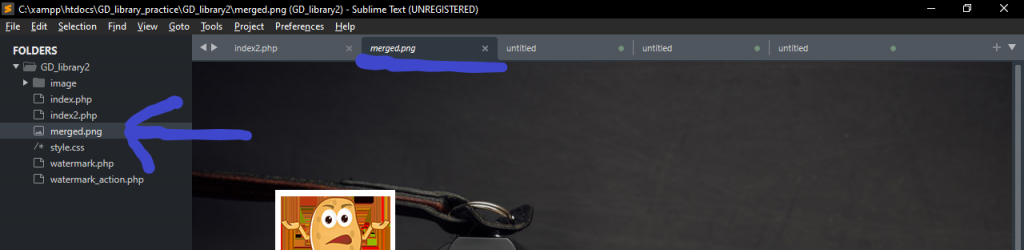
尝试显示文件所在的示例
保存页面去浏览器刷新页面,下面是浏览器的输出,输出也会在文件目录中生成。
如何使用 PHP GD 生成图像和水印图像
这是向图像添加水印的方法。通过这种策略,您可以提高您的技术技能,因为您作品中的图像将很难被盗,因为它上面有水印。因此,Watermark背后的概念是,它是防止图片被盗或被他人重复使用的最优秀的方法之一。
通过使用水印,您可以使照片的所有者可见。水印可以更轻松地确定照片或图像的拍摄者。在受版权保护的图像中,通常使用水印印章。图像通常包含包含创建者姓名或公司徽标的水印。
现在,要创建水印图像,我们将使用一个非常动态的概念。首先,我们将有一个索引页。放入水印图像的页面和要添加水印的图像。
index.php看起来非常简单,代码如下。
<!DOCTYPE html>
<html>
<head>
        <meta charset="utf-8">
        <meta name="viewport" content="width=device-width, initial-scale=1">
        <link rel="stylesheet" type="text/css" href="style.css">
        <title>GD</title>
</head>
<body>
    <div>
      <form class="form" action="watermark_action.php" method="post" enctype="multipart/form-data">
        <p>Select An Image File to Upload:</p>
        <input class="files" type="file" name="i_file">
        <p>Select Your Choice of watermark Image File to Upload:</p>
        <input class="files" type="file" name="w_file">
        <input type="submit" class="btn" name="submit" value="Upload">
      </form>
    </div>
</body>
</html>
这是上述代码的CSS,创建一个样式.css文件,并在其中编写以下代码。
*{
        padding: 0;
        margin: 0;
        box-sizing: border-box;
        text-align: center;
}

div.form{
        display: block;
}

form{
        margin-top: 40px;
        display: inline-block;
        margin-right: auto;
        margin-left: auto;
        padding: 30px;
        background-color: ;
        box-shadow: 5px 5px 10px 10px lightgray;
}

p{
        font-size: 18px;
        color: black;
}

input{
        padding: 10px;
        margin: 5px;
}

.files{
        padding: 10px;
        margin: 5px;

}

.btn{
        padding: 10px;
        width: 100%;
        border: 0;
        border-radius: 20px;
}
.btns{
        padding: 10px;
        width: 20%;
        margin: 5px;
        background-color: red;
        border: 0;
        color: white;
        text-decoration: none;
        border-radius: 20px;

        position: absolute;
        right:    0;
        bottom:   0;
}

.btn:hover{
        background-color: black;
        color: white;
        transform: scale(0.9);
        transition: 2s;
}
完成此过程后,您将获得如下所示的样式表单
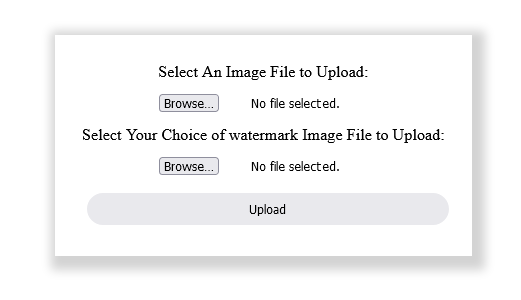
现在使用上面的代码,您将能够填写您选择的图像和您选择的水印。
接下来,您将创建另一个文件,并为其提供我们刚刚创建的表单的 action 属性的名称。创建一个文件,并在我们的例子中为其指定您的操作属性的名称。因此,您将打开文件并粘贴下面的代码。我将简要解释我在代码中做了什么watermark_action.php
首先,您需要创建一个名为image的文件夹,您可以将其命名为您想要的任何名称。此图像文件夹将包含要添加水印的图像,您将先将其保存在文件夹中,然后再在另一个文件中调用它。
然后在“操作”页面上,您将创建一个会话,以便我们能够存储要在多个页面上使用的信息(在变量中)。
现在,您将创建一个变量,该变量将检查您的代码是否有错误,下面是使您能够执行某些错误处理的代码。
<?php
//declare an error variable and an error_msg variable
//the variables enable you to assign your errors to the variable.
  $error = 0;
  $error_msg = "";
?>
随着我们的继续,您将看到错误变量的使用。
接下来要做的是创建一个函数,这个函数的原因是可以一次调用函数内部编写的条件语句,而不是一个接一个地调用开关情况。
下面的函数接受两个参数,第一个参数是使用该方法将图像名称的字符串转换为小写,并将其保存回$ext变量中。strtolower()
下面的代码解释了更多关于它的信息。
<?php
//create a function that accepts two parameters
  function make_image($ext, $src){
    $ext = strtolower($ext);
  //Load the stamp and the photo to apply the watermark to
    switch ($ext) {
        case 'jpg':
            return $result = imagecreatefromjpeg($src);
        break;
        case 'jpeg':
            return $result = imagecreatefromjpeg($src);
        break;
        case 'png':
            return $result = imagecreatefrompng($src);
        default:
            return $result = imagecreatefromjpeg($src);
        break;
  }
?>
请注意,switch case的默认值是必需的,如果案例中的所有条件都未运行,则默认值将运行。
下一步是创建一个文件夹,其中将包含正在选择的图像。创建后,它将在代码编辑器上可见。你可以随心所欲地命名它,但我命名了我的名字,并将它们分配给一个variable.images
将两个输入标签的名称保存在全局变量中,并将其插入到变量中,以便可以轻松调用它。$_FILES
我们使用 if 语句来检查图像或水印图像是否为空。
下面的代码对此进行了更多解释。
<?php
//you will write the name of the image folder and assign it to a variable
  $targetDir = "images/";
   //save the name of the files in a variable image, watermark
    $image = $_FILES['i_file'];
    $watermark = $_FILES['w_file'];
     //checks if the image and watermark are empty
    if ($image['error'] != 0 || $watermark['error'] !=0) {
        $error = 1;
        $error_msg.="error uploading image <br>";
    }
?>
您已经能够检查图像是否为空。如果它是空的?它将抛出一个错误,说上传图像时出错。
现在,我们将在提交时将图像的名称更改为随机数。您需要做的就是调用变量并将目标目录(也称为目标目录)保存在新变量中。该方法将获取文件名,如果路径具有多个扩展名,则仅获取最后一个扩展名。targetDirpathinfo()
花点时间学习下面的代码,您将更好地理解前面解释的内容。
<?php
  $realimage = $image['tmp_name'];
  $realwatermark = $watermark['tmp_name'];
      // File upload path
  $imagepath = $targetDir . sha1(microtime()) . $image['name'];
  $watermarkpath = $targetDir . sha1(microtime()) . $watermark['name'];
  //if the route contains more than one extension, it just returns the most recent extension.
  $image_ext = pathinfo($image['name'],PATHINFO_EXTENSION);
  $watermark_ext = pathinfo($watermark['name'], PATHINFO_EXTENSION);
?>
我们已经能够在水印图像和主图像的路径上工作。
因此,在处理了图像的目录之后,我们需要列出项目中允许的图像扩展类型,包括扩展的字体大小。
因此,下面我们将列出我们需要的扩展类型并执行一些if语句,第一个if语句包含内置函数 。所做的是查找数组中的特定值。in_array()in_array()
因此,他们将检查列出的文件类型是否有效。in_array()
第二个if语句,当满足条件时,您将上传的文件移动到其路径。
<?php
//an array of image extensions saved in a variable $allowedType
  $allowedType = array('jpg', 'jpeg', 'png', 'JPG', 'JPEG', 'PNG');
  //Get the array extension and the type that is allowed
    if (in_array($image_ext, $allowedType)) {
        if (in_array($watermark_ext, $allowedType)) {
        //move the file you want to upload, to their various paths or destination
            move_uploaded_file($realwatermark, $watermarkpath);
            move_uploaded_file($realimage, $imagepath);
            //calling the above function and saving it inside their various variable
            $p_image = make_image($image_ext, $imagepath);
            $p_watermark = make_image($watermark_ext, $watermarkpath);
        }else{
        //if the watermark type is not in the array, it will throw 1 error
            $error = 1;
            $error_msg.="Invalid watermark Type";
        }

    }else{
    //if the watermark type is not in the array, it will throw 1 error
        $error = 1;
        $error_msg.="Invalid image Type";
    }
?>
我们差不多四舍五入了,图像集的类型经历了几个条件。
只需阅读下面代码上的注释,您就可以更清楚地了解每行代码。下面我们设置水印图像的marge bottom或marge right。
我们还得到了水印的高度和重量。在定位上工作,并将图像保存在我们的图像文件夹和变量中。$_SESSION
我们立即使用我们的位置进行重定向,它将把我们带到另一个名为水印的界面.php。header()
下面是执行前面所述内容的代码。
<?php
  //Set the margins for the watermark
    $marge_right = 10;
    $marge_bottom = 10;

    //Get the height/width of the watermark image
    $sx = imagesx($p_watermark);
    $sy = imagesy($p_watermark);

    // Copy the watermark image onto our photo using the margin offsets and
    // the photo width to calculate the positioning of the watermark.
    imagecopy($p_image, $p_watermark, imagesx($p_image) - $sx - $marge_right, imagesy($p_image) - $sy - $marge_bottom, 0, 0, imagesx($p_watermark), imagesy($p_watermark));
    //Save the image
    imagepng($p_image, $imagepath);
    imagedestroy($p_image);
   //Save the $imagepath in the SESSION variable
    $_SESSION['img'] = $imagepath;
    //will take you to the page where you will see the image you watermarked.
    header("Location: watermark.php");
?
我们已经完成了上述代码的解释。
以下是上面解释的所有内容。你可以仔细观察它,看看是否有任何不对劲的地方。
<?php
  // Path configuration Page
  session_start();
 //declare an error variable and an error_msg variable
 //the variables enable you to assign your errors to the variable.
  $error = 0;
  $error_msg = "";

  //create a function that accepts two parameters
 function make_image($ext, $src){
    //Load the stamp and the photo to apply the watermark to
    $ext = strtolower($ext);
    switch ($ext) {
        case 'jpg':
            return $result = imagecreatefromjpeg($src);
        break;
        case 'jpeg':
            return $result = imagecreatefromjpeg($src);
        break;
        case 'png':
            return $result = imagecreatefrompng($src);
        default:
            return $result = imagecreatefromjpeg($src);
        break;
    }
 }
 //you will write the name of the image folder and assign it to a variable
  $targetDir = "image/";
  //save the name of the files in a variable image, watermark
  $image = $_FILES['i_file'];
  $watermark = $_FILES['w_file'];
  //checks if the image and watermark are empty
  if ($image['error'] != 0 || $watermark['error'] !=0) {
      $error = 1;
      $error_msg.="error uploading image <br>";
  }

  $realimage = $image['tmp_name'];
  $realwatermark = $watermark['tmp_name'];
    // File upload path
  $imagepath = $targetDir . sha1(microtime()) . $image['name'];
  $watermarkpath = $targetDir . sha1(microtime()) . $watermark['name'];

  $image_ext = pathinfo($image['name'],PATHINFO_EXTENSION);
  $watermark_ext = pathinfo($watermark['name'], PATHINFO_EXTENSION);

  //an array of image extensions saved in a variable $allowedType
  $allowedType = array('jpg', 'jpeg', 'png', 'JPG', 'JPEG', 'PNG');
  if (in_array($image_ext, $allowedType)) {
  //Get the array extension and the type that is allowed
    if (in_array($watermark_ext, $allowedType)) {
    //move the file you want to upload, to their various paths or destination
        move_uploaded_file($realwatermark, $watermarkpath);
        move_uploaded_file($realimage, $imagepath);
        //calling the above function and saving it inside their various variable
        $p_image = make_image($image_ext, $imagepath);
        $p_watermark = make_image($watermark_ext, $watermarkpath);
    }else{
    //if the watermark type is not in the array, it will throw 1 error
        $error = 1;
        $error_msg.="Invalid watermark Type";
    }
  }else{
  //if the watermark type is not in the array, it will throw 1 error
      $error = 1;
      $error_msg.="Invalid image Type";
  }
    //Set the margins for the watermark
    $marge_right = 10;
    $marge_bottom = 10;

    //Get the height/width of the watermark image
    $sx = imagesx($p_watermark);
    $sy = imagesy($p_watermark);

  // Copy the watermark image onto our photo using the margin offsets and
  // the photo width to calculate the positioning of the watermark.
   imagecopy($p_image, $p_watermark, imagesx($p_image) - $sx - $marge_right, imagesy($p_image) - $sy - $marge_bottom, 0, 0, imagesx($p_watermark), imagesy($p_watermark));
    //Save the image
    imagepng($p_image, $imagepath);
    imagedestroy($p_image);
    //Save the $imagepath in the SESSION variable
    $_SESSION['img'] = $imagepath;
    //will take you to the page where you will see the image you watermarked
    header("Location: watermark.php");
?>
完成所有这些操作后,我们需要将其输出到另一个命名的watermark.php。
在此页面上,您将编写几行PHP代码。首先,您将启动一个会话,因为我们在操作页面上所做的一切都保存在会话中,因此在选择它时,您需要启动会话。启动会话后,您将调用图像保存在操作页面中的变量。
然后要做的最后一件事是创建一个图像标签,在标签中,您将使用短的PHP标签来回显分配给它的会话的变量。通过编写该代码,您现在可以明显地看到您的输出。src<``imgsrc="">
<?php
  session_start();
  $imagepath = $_SESSION['img'];
?>

<!DOCTYPE html>
<html>
<head>
        <meta charset="utf-8">
        <meta http-equiv="content-type" name="viewport" content="width=device-width, text/html initial-scale=1">
        <link rel="stylesheet" type="text/css" href="style.css">
        <!-- <meta  content="; charset=UTF-8"> -->
        <title>GD</title>
</head>
<body>
        <h1>Your Result</h1>
            <img src="<?=$imagepath ?>">
            <a href="index.php" class="btns">Go back to for more Watermarking</a>

</body>
</html>
以下是上述代码如何在实时服务器上运行的实时视图。
<iframe frameborder="0" width="100%" height="500px" src="https://GD-watermark.emmykolic.repl.co"></iframe>
结论
本教程已经到此结束,希望您能从中获得大量价值。
学习如何创建水印图像和文本, 使用 PHP GD 库.
本教程还没有结束,我们将更多地讨论您可以使用GD库做什么。
")


